
Quick & Affordable Garden Bed Watering Options: (Step-by-Step Guide)
After we built our raised garden beds, I quickly realized hand-watering every day wasn’t realistic especially in the summer. I needed something automatic and reliable, so I tied a drip irrigation system into my existing sprinkler setup. It’s been one of the best upgrades I’ve made and can be completed in just a few hours for under $100.
Drip systems are simple and efficient and helps you put your garden on auto-pilot. They deliver water directly to plant roots, reduce weeds and disease, and once set up, run on their own. If you’re taking the time to build a garden, this is the no-brainer upgrade that will make your investment pay off season after season. Once it’s in, your garden basically waters itself, and you’ll wonder why you didn’t do it sooner.
Materials You’ll Need (links will take you to Amazon):
1/4” drip tubing (feeder lines)
Sprayers for above ground watering
Pressure regulator with filter
Barbs for adapting from 1/2” to 1/4” inch tubing transition
Sprinkler-to-drip adapter - for Option 1
Hose adapter - for Option 2
Hose timer - for Option 2
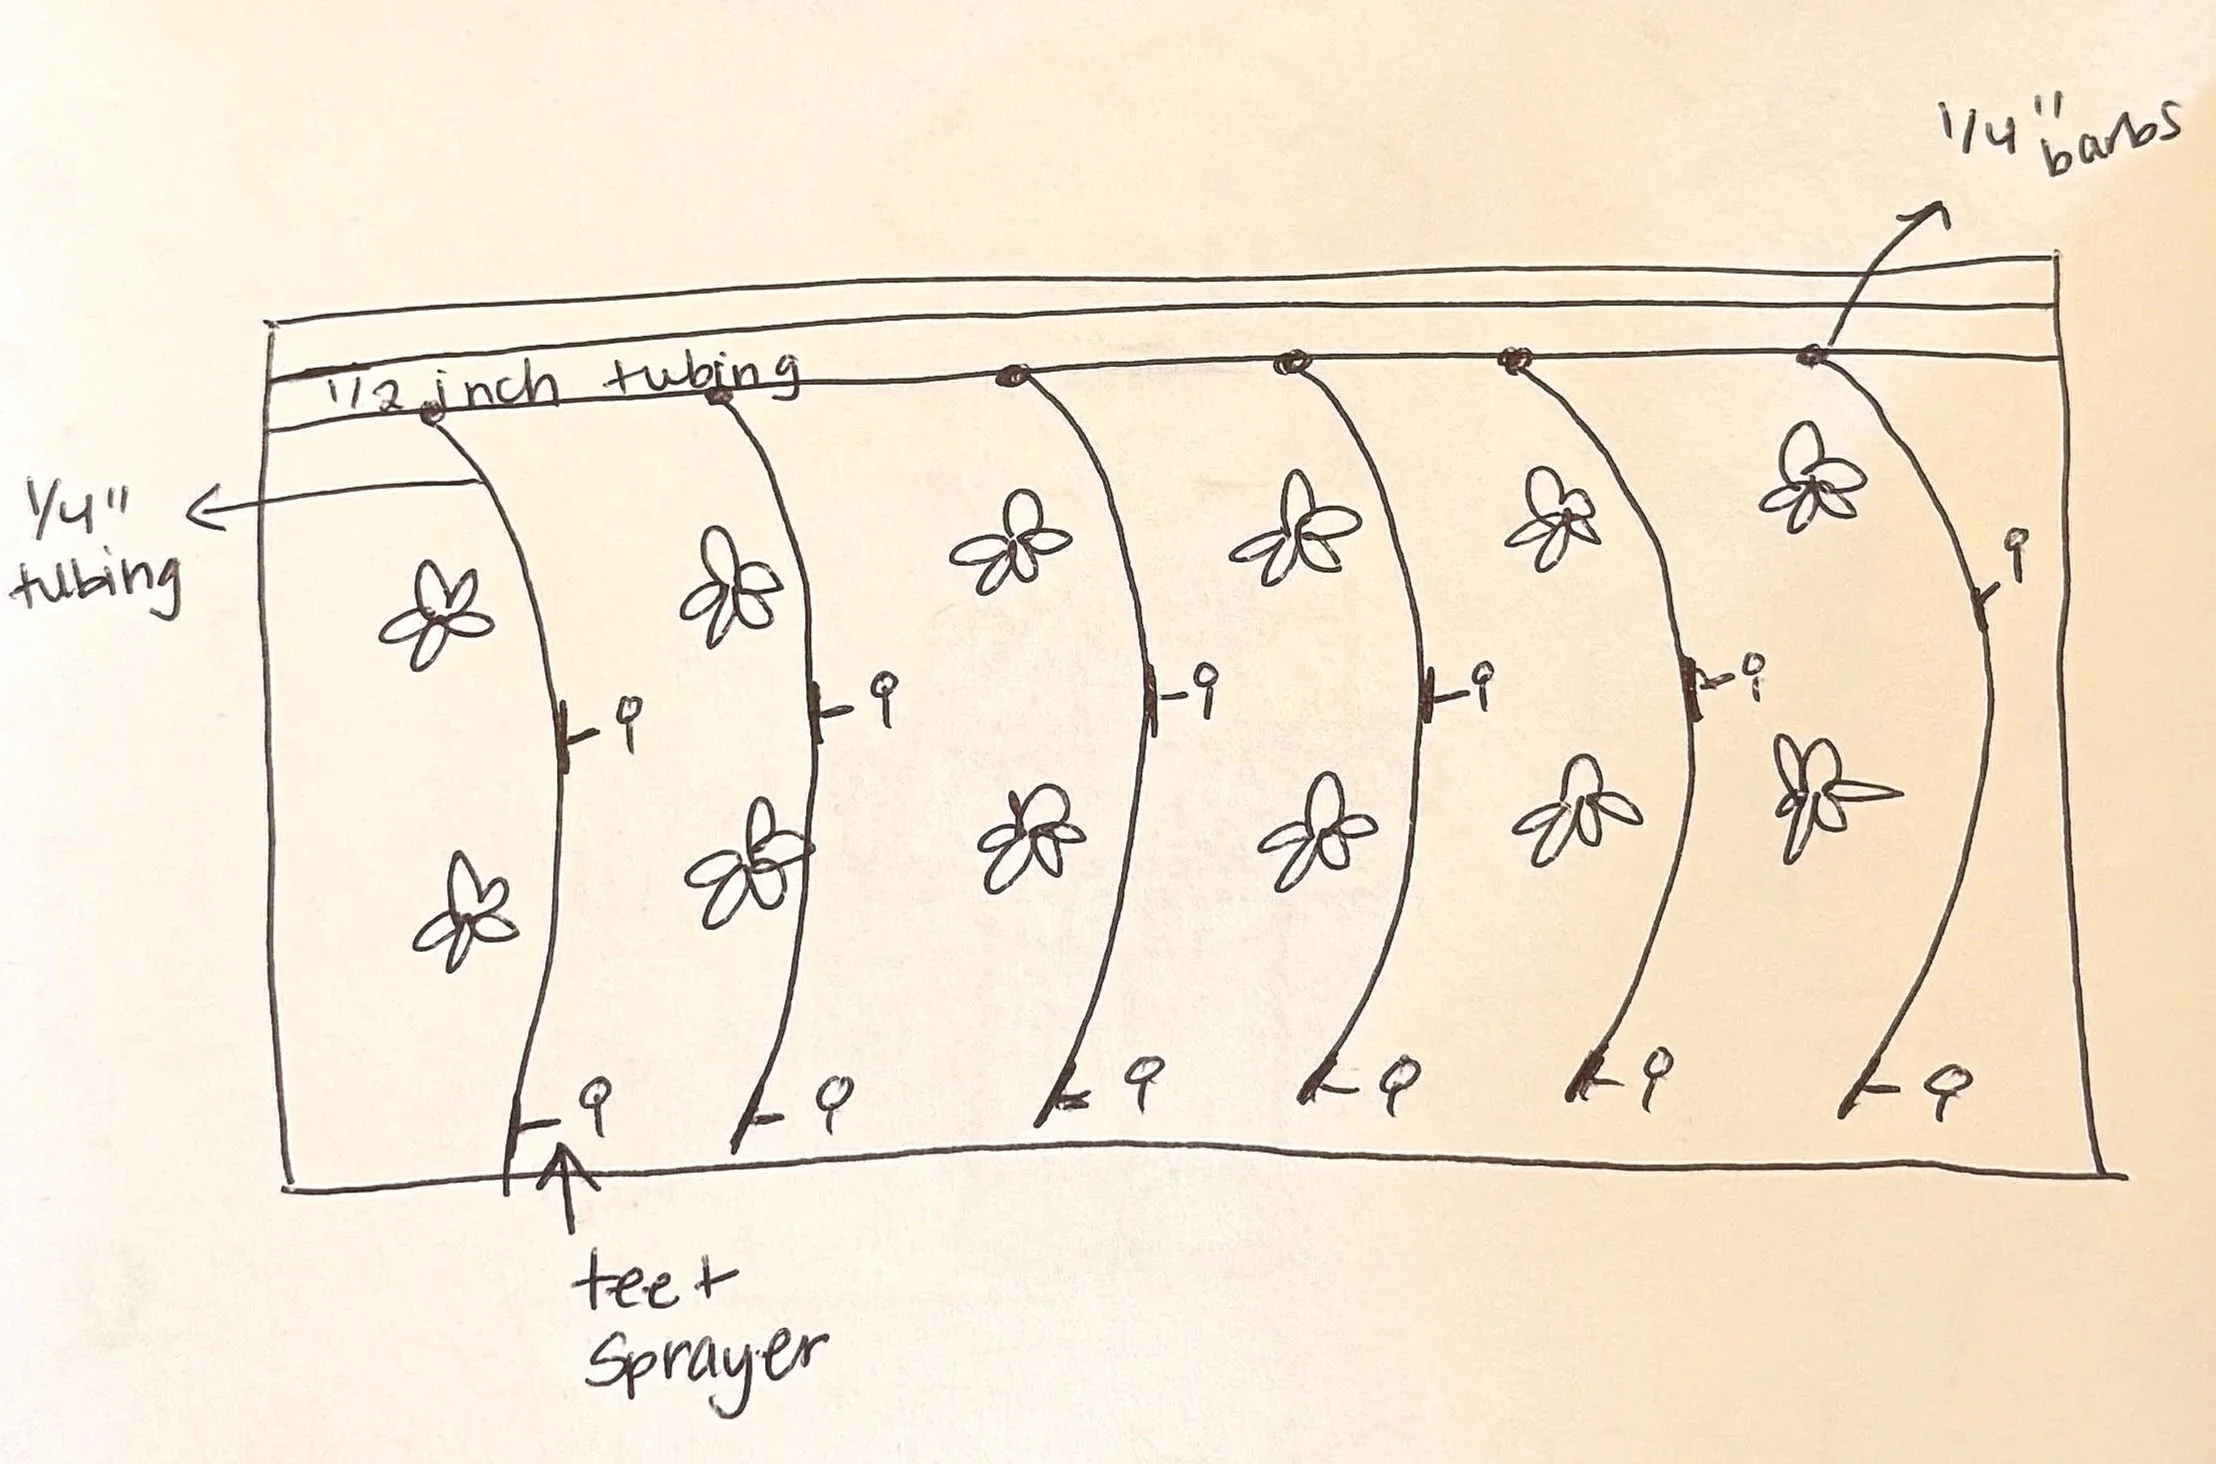
An extremely artistic rendering of what your garden setup will look like when you’ve completed the steps. Be sure to cap the end of the 1/2” tubing and end each 1/4” tubing section with a sprayer so you don’t have any unnecessary water loss.
Steps to Install:
A few options exist for how and why you might choose to setup your watering system. Depending on where your garden beds are located, and how permanent you want the fixture to be will impact the setup. Take a look below for what works best for your scenario.
Option 1 - If you have a sprinkler head nearby: this setup will run with the sprinkler system, so ensure that your sprinkler system is setup on the cadence that works for your garden. Don’t worry about over-watering, that is where the pressure regulator comes in.
Remove the sprinkler head and install a drip adapter (with pressure regulator and filter)
Run the ½” tubing from the adapter, along one side of your garden bed, to the end of the bed.
Place an end cap on the end of the 1/2” tubing
Punch holes in the 1/2” tubing at each row of plants and connect the 1/4” barbed adapters
Connect the 1/4” tubing at each barb and weave it through your beds, ending where you want your last sprayer to be
Snip the 1/4” tubing that you’ve woven through the bed roughly every 12-16 inches
Place the tee at every section that you’ve snipped and connect the snipped edges of 1/4” tubing onto the tee
At the barb coming off of the tee, add 1-4 inches of 1/4” tubing and connect your sprayer to that offshoot of tubing
Continue on throughout the bed until all sections have a tee, tubing and sprayer connected at each snipped section
Turn on the water and check for leaks and water coverage to make sure proper spacing.
Once happy with spacing, stake down the tubing lines
Fine tune over the next few days as you monitor the garden
Adjust watering timing by adjusting the sprinkler zone on your sprinkler controller
Option 2 - If you have access to a nearby hose, and prefer this to tapping into a sprinkler -
Screw in the hose timer to the hose bib (this will allow you to customize the timing of watering)
Once the hose timer is connected, connect the hose adapter to the the 1/2” drip tubing out to the garden bed
At the garden bed, connect 1/2” drip tubing to pressure regulator/ filter
Then connect another section of 1/2” tubing on the open end of the Pressure regulator/filter
Run the ½” tubing from the regulator, along one side of your garden bed, to the end of the bed
Place an end cap on the end of the 1/2” tubing
Punch holes in the 1/2” tubing at each row of plants and connect the 1/4” barbed adapters
Connect the 1/4” tubing at each barb and weave it through your beds, ending where you want your last sprayer to be
Continue on with the 1/4” drip tubing weaving it through your beds
Snip the 1/4” tubing that you’ve woven through the bed roughly every 12-16 inches
Place the tee at every section that you’ve snipped and connect the snipped edges of 1/4” tubing
At the barb coming off of the tee, add 1-4 inches of 1/4” tubing and connect your sprayer to that offshoot of tubing
Continue on throughout the bed until all sections have a tee, tubing and sprayer connected at each snipped section
Turn on the water and check for leaks and water coverage to make sure proper spacing.
Once happy with spacing, stake down the tubing lines
Set your hose timer to appropriately water the garden based on bed size and temperatures
Fine tune over the next few days as you monitor the garden
A few things that matter no matter which setup you choose:
Always use a pressure regulator - it ensures that the plants all receive the same amount of water (and water doesn’t blast them with the hose/sprinkler pressure)
If possible, keep similar plants on the same line where possible as they require the same types of water
Happy Watering!